These files use a lot of memory - up to 10 gigabytes for every hour of your recorded data - so converting to a DVD disc can free up your hard drive space.
The computer or laptop must be equipped with a DVD burner to record videos to disc. Most computers with a burner will also have DVD software installed to manage the recording. With a supply of blank recordable DVDs, videos can be moved off the computer's hard drive and onto long-lasting media discs.
Items you will need:
Computer with DVD burner
Video files stored on the computer - (e.g., from a video camera, webcam or smartphone)
Blank DVDs
Step-by-Step Instructions:
Step 1
Insert a blank, recordable DVD into the media tray of the computer, and close the tray.
Step 2
Open the program that manages the DVD burner, such as Windows DVD Maker or iMovie (Mac).
Step 3
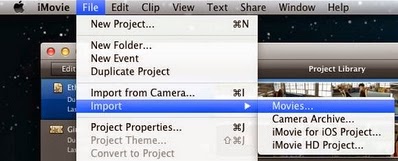
Click the "File" button, and select "New" or "New Project," depending on the software.
 |
Transfer video files to DVD
|
Step 4
Click the "Add Items" or "Import" tabs, then select the videos to be burned to the DVD by clicking (or dragging) each video file. This will move copies of the videos into a list of files for recording to disc.
Step 5
Click "Next" and/or select menu styles (themes), recording options and other preferences.
Step 6
Click the "Burn" tab to record the video files to DVD.
**Note to Mac owners (Macs bought 2011 or later): iDVD is no longer available to use to burn your video files to DVD. You will have to use the 'Share' option in iMovie to format your video files and save them to your computer, then:
You can download either of these free, easy-to-use apps from the Apple store to complete the DVD burn of these files:
1-Click DVD Creator
Free DVD Creator
Looking to transfer your video tapes to DVD? Visit our VHS Tapes to DVD page.
Video Files to VCD - Another Option!
Video Files to VCD - Another Option!
Question: Did you run out of blank DVD's? Do you have photos, camcorder video files, etc., that are not longer than 74 minutes of total playing time or not bigger than 700 mb?
Answer: Then if you have some blank CD's laying around, you can try burning and creating a VCD (Video Compact Disc).
Advantages to VCD's:
1) They are usually cheaper than blank DVD's, usually only costing somewhere between 25 and 10 cents each.
2) VCD's can store both audio (CD) and video files (DVD). However, like an audio cd, the storage limit is around 700 mb per disc.
3) VCD's usually use the MPEG-1 format, which is highly compatible with most computers' CD players and virtually any kind of DVD player.
Trade-off's:
1) Picture and sound quality are usually inferior to a DVD, especially if the video file(s) are larger than 700 mb, because some compression has to occur to store the video on the disc, which can lower the resolution from 720x480 (DVD) to 352x240 (VCD).
2) Surround sound may be degraded a bit, however, any stereo sound should be pretty much un-affected.
1) You must first have a video file that is already in MPEG-1 format. For example, a video that you took with your camcorder and then transferred to your computer's hard drive. This file must be encoded in the MPEG-1 format before burning it to disc.
2) Usually encoding software is used for this, like Aiseesoft Software, which also offers a free download and trial.
3) Once encoded to MPEG-1, you may use your normal CD burning software to burn the VCD. Just insert a blank, recordable CD into a CD recordable drive, open your CD burning application, and follow the prompts.
4) Viewing a VCD - it will be viewable in almost any computer drive as well as a vast majority of DVD drives.
'Give it a try, and Happy Burning!'
Tips
Deleting video files from the computer is a separate step. The original video files will remain on the computer's hard drive after copying them to VCD or DVD. Get rid of unwanted files by selecting each video for removal, right-clicking and selecting "Delete."Warnings
Wait for the DVD to finalize before removing it from the computer. Finalization prepares a disc for playback on other equipment. Removing the DVD before it finalizes can ruin the recording.Test your VCD or DVD to see if the recording is complete and plays properly with no errors, before deleting the original file from your computer.
<VHS Tapes to DVD page> <Copy Blu-ray to DVD page>
No time to do it yourself?
To have a look at some sites that do most or all of the work for you, go here for some great assistance with video transfer.


l
ReplyDeletetuoa Qaoe Loa Qaoe
ReplyDeleteCoa Qaoe Loa Gaoe QAoe Coa Qaoe
ReplyDeleteC'est bon
ReplyDeletehy
ReplyDeleteGo to best file transfer site GuruTransfe.com
Deletefff
Deletehttps://www.gurutransfer.com/blog/number-one-strategy-for-sending-large-files
ReplyDeletehttps://www.gurutransfer.com
ReplyDeleteEsse programa e nota 10.
ReplyDeleteI haven’t any word to appreciate this post.....Really i am impressed from this post....the person who create this post it was a great human..thanks for shared this with us. dvd duplication service
ReplyDelete